Cloning a WordPress Site
This guide will walk you through the steps to clone a WordPress site from one installation to another. This is useful for creating a development environment for a site that is already live, or for creating a staging environment for a site that is still in development (or refreshing the content of that site).
Notes/Prerequisites
- If this is a relatively small site, you may want to use the clone site tool in cPanel instead. This guide is intended for larger sites with too many assets to be cloned properly
- This guide assumes that the destination site is already set up and ready to go. (ie., the database is created, the domain is pointed to the server, WordPress is installed, etc…)
- As always, make sure you have a backup of the destination site before proceeding.
- SSH access is required for this guide. If you are using a cPanel server, you can access SSH by going to cPanel > Advanced > Terminal or by following our SSH setup guide.
- The WordPress CLI is required for this guide.
Steps
-
Download the contents of
/wp-content/uploadsfrom the live site using ONE of the following methods.- (Easier) Using an FTP client such as FileZilla to copy
/wp-content/uploadsa local directory.- This will take a while (hours), depending on the size of the site. However, the next few steps can be done concurrent to that.
- (Preferred) Using SSH to compress and transfer the directory contents. This will be much quicker (in the range of hours), but the exact flow is outside the scope of this guide.
- As a brief overview:
-
SSH into the server.
-
Navigate to the
wp-contentfolder of the site. -
Archive and compress the
uploadsdirectory.tar -zcvf uploads-backup.tar.gz uploads -
Use scp to transfer the file to your local machine.
Replace
user@sourcewith the SSH user, and adjust the path to wp-content/uploads-backup.tar.gz as needed.scp user@source:wp-content/uploads-backup.tar.gz /path/to/local/uploads-backup.tar.gz
-
- As a brief overview:
- (Easier) Using an FTP client such as FileZilla to copy
-
Export the database from the live site using phpMyAdmin.
- If you are using a cPanel server, you can access phpMyAdmin by going to cPanel > Databases > phpMyAdmin.
- Select the database for the source site from the left sidebar. (Depending on configuration, there may only be one database available.)
- Click on the “Export” tab at the top of the page.
- Click the “Custom” radio button.
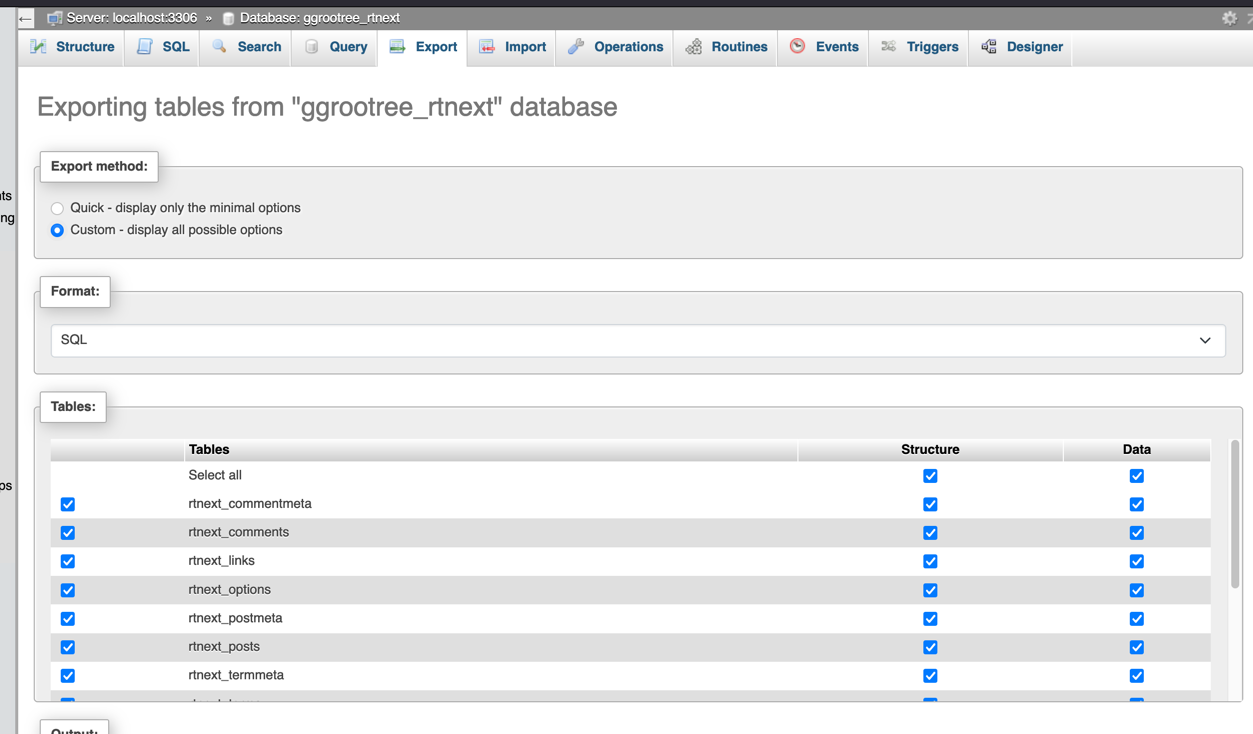
- Under tables, make sure to exclude the following tables (data and structure) if they are present (where * is the table prefix):
- *_wflogins
- *_wfknownfilelist
- *_wfsnipcache
- Under “Object creation options,” make sure to turn on the following option(s):
- “IF NOT EXISTS” under “Add Create Table statement”
- Under “Data creation options,” make sure to turn on the following option(s):
- “Truncate table before insert”

- “Truncate table before insert”
- Click “Export” at the bottom of the page.
- Save the file to a local directory.
-
Download the Database Patcher script and place it in the same directory as the database export.
-
Open a terminal window and navigate to the directory containing the database export and the Database Patcher script.
-
Run the following command to make the script executable:
chmod +x wp-db-patcher.sh -
Run the following command to change the database table prefix and gzip the .sql file. (replacing the placeholder values with the actual values):
- The first argument is the name of the database export file. (e.g.,
datbase_name.sql) - The second argument is the table prefix of the source site. (e.g.,
wp_) - The third argument is the table prefix of the destination site. (e.g.,
wp_)- It is highly recommended to use a different table prefix for the destination site.
- It is also highly recommended to use the existing prefix of the destination site (as long as it is different from the source.) Caching, and other plugins can cause issues if the table prefixes are the same.
./wp-db-patcher.sh export_file_name.sql old_table_prefix new_table_prefix "http://old_site_url" "https://new_site_url" - The first argument is the name of the database export file. (e.g.,
-
Ensure that all plugins and themes are installed on the destination site. It is typically much quicker (and prone to working) to install them from their Zip files than it is to copy the files from the source site.
-
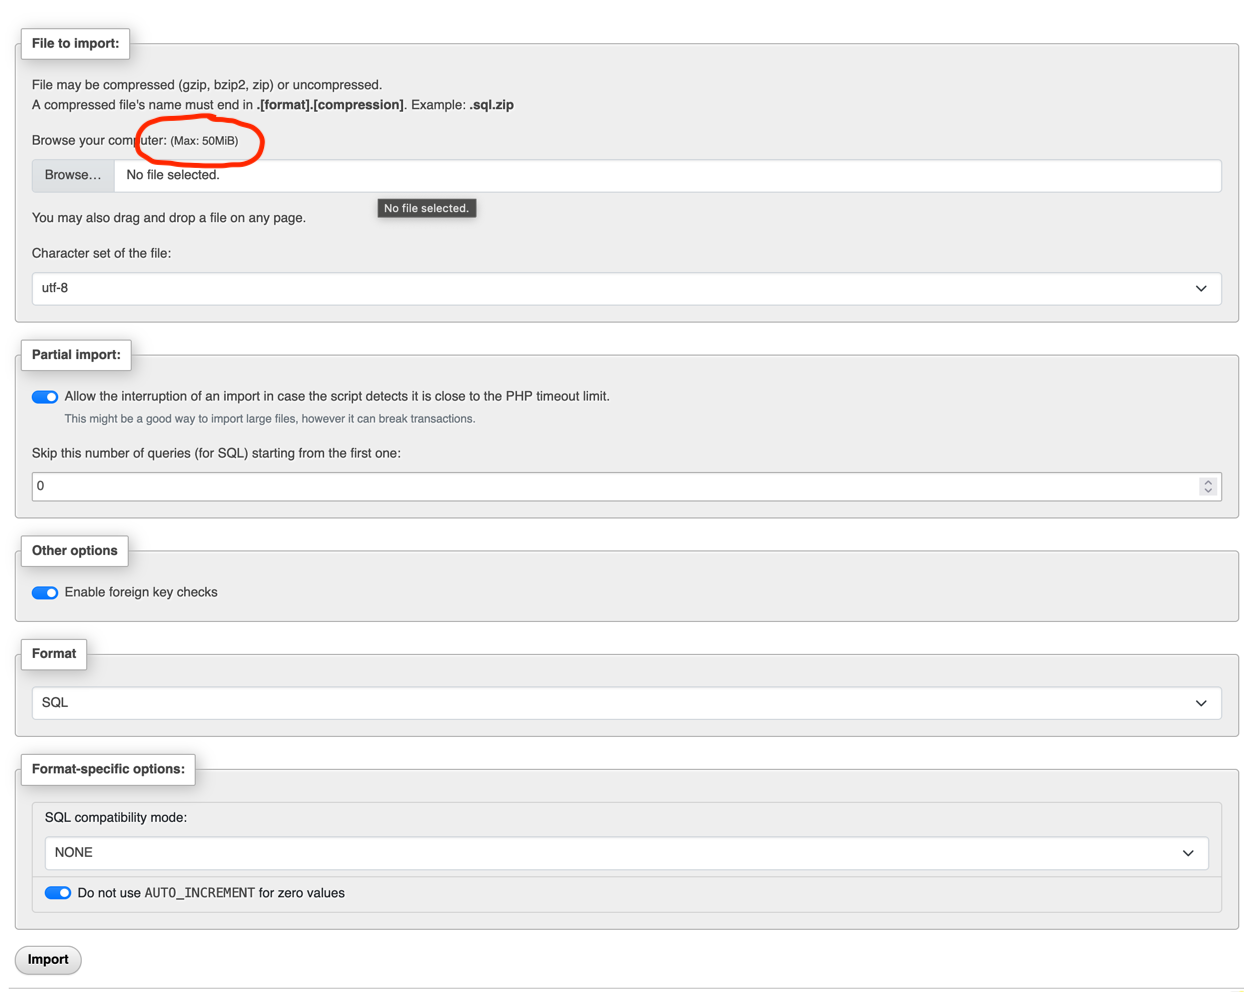
Import the patched SQL file using phpMyAdmin for the destination site.
- Important If you are importing to a site with a blank or incomplete table structure, stop the web server if possible (ie. Docker). If the site is accessed during the import, indices can be corrupted.
- Click on the database for the destination site from the left sidebar.
- Click on the “Import” tab at the top of the page.
- Check the maximum file size allowed by the server.
-
If the file is smaller than the maximum file size, you can upload the file directly from your computer. (All the default options should be correct)
-
If the file is larger than the maximum file size, you will need to upload the file to the server and import it from there using the CLI.
- You can upload the file to the server using an FTP client.
- You can import the file using the following command (replacing the placeholder values with the actual values):
mysql -u username -p database_name < export_file_name.sql
-
-
Ideally, at this point, the download of the /wp-content/uploads directory should be complete. If not, wait until it is.
-
Upload the contents of the /wp-content/uploads copy to the /wp-content/uploads directory of the destination site. The method to use will correspond to the method used to download the files.
- If the files were downloaded using an FTP client, use the same client to upload the files to the server.
- If the files were compressed and then downloaded using SSH, use the following steps:
-
Upload the .tar.gz file to the server using scp.
Replace
user@destinationwith the SSH user, and adjust the path to wp-content/uploads-backup.tar.gz as needed.scp /path/to/local/uploads-backup.tar.gz user@destination:wp-content/uploads-backup.tar.gz -
SSH into the server, navigate to the /wp-content directory, and run the following command to extract the files:
tar -xzvf uploads-backup.tar.gz
-
-
If the destination site is using a caching plugin, clear the cache.
-
Ensure that the site is working as expected.
Bonus Tips
- If you use the .tar.gz file method, be sure to remove the .tar.gz file from the server after extracting it.
- If you are cloning a site to the same server, be extra careful with the table prefixes. Caching, and other plugins can cause issues if the table prefixes are the same. (ie. it will cache the source site’s pages and serve them to the destination site’s visitors)